Growing Kanna from seeds has some pros and cons. On the one hand, seeds are a great way to get some new genetics into your collection. On the other hand, seeds can be challenging to grow. This series will provide you with the tools you need to grow your own Kanna from seed. Today, we will focus on germinating your seeds.
New Genetics:
Cuttings are a great way to increase your number of plants, but cuttings are simply clones of their mother plant. Cuttings won’t add any genetic diversity to your collection. Don’t get me wrong, cuttings are a great tool to safeguard and grow your Kanna collection! Seeds are another great tool because they are different genetically from their parents. Keep in mind to get your plants to seed, you need two genetically different plants to pollinate each other. Kanna is not self fertile (ie, able to pollinate itself and produce seeds) like some other plants.
Kanna Seeds Present Some Challenges:
Kanna seeds are small and can be tough to germinate. Their physical size makes them difficult to handle and hard to keep track of when you plant them.
Additionally, Kanna can take quite a while to germinate. The prevailing theory is that the seed coats have a germination inhibiting compound which keeps the seeds from germinating for up to a few months.
In nature, germination inhibitors are a clever strategy by plants to increase the odds of their offspring’s survival. If all of a plant’s seeds sprout at once, all of the baby plants are threatened by the same environmental hazards such as weather, fires, and animal predation. Whereas if a germination inhibitor spaces out the growth of a batch of seeds, some of the seedlings may sprout after some potential dangers have passed.
Unfortunately for us, germination inhibitors aren’t much use to plants grown “in captivity” and a long wait can be frustrating and perhaps lead to seed trays being thrown out with viable seeds that just needed a bit more time.
This article will aim to give you an overview of the seeds, how to handle them, and how we can bypass the germination inhibitor to successfully germinate your seeds.
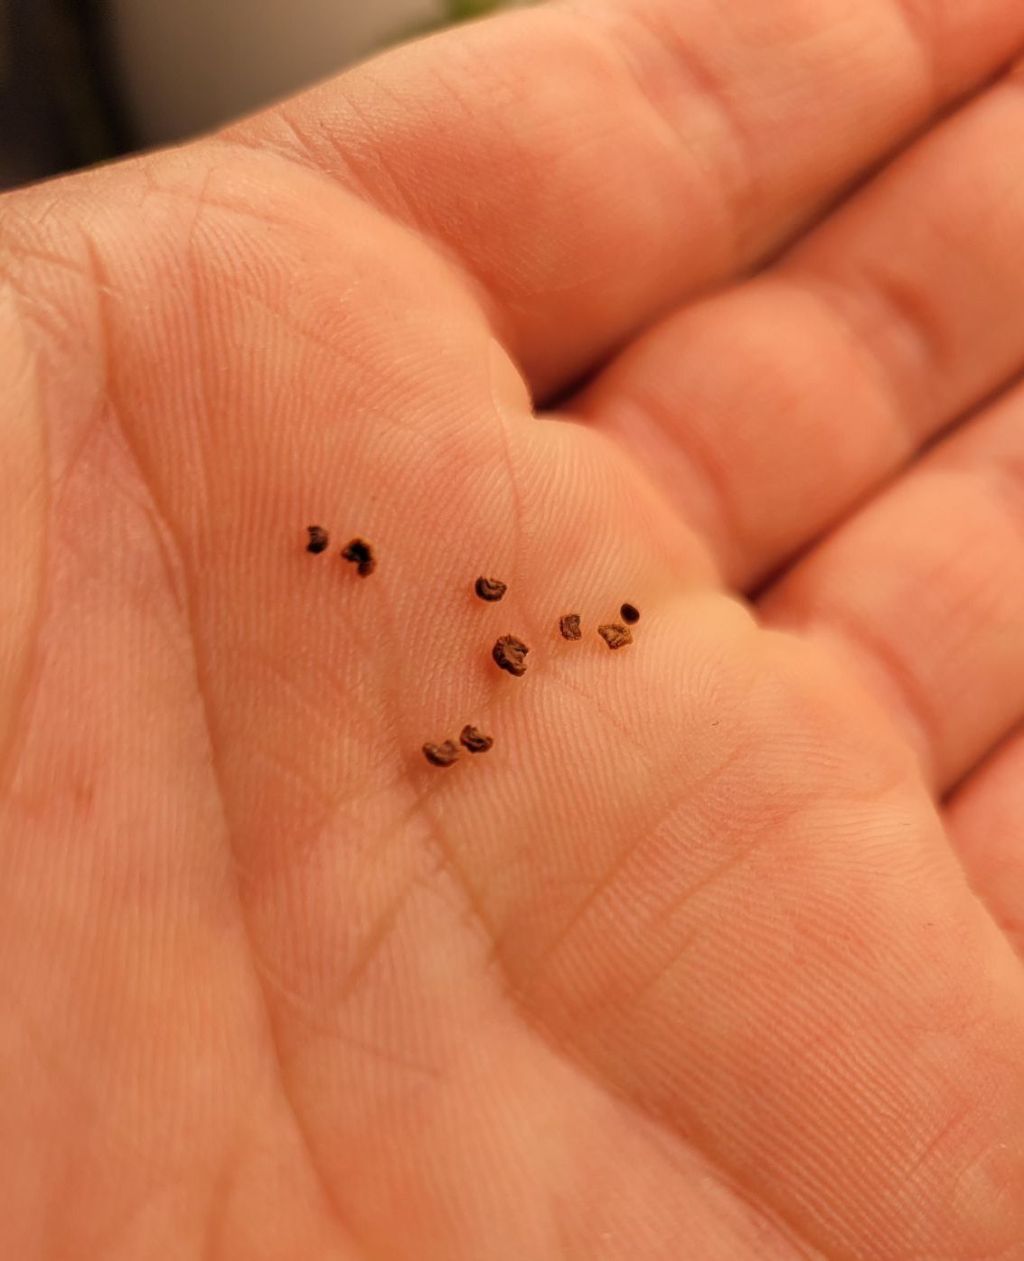
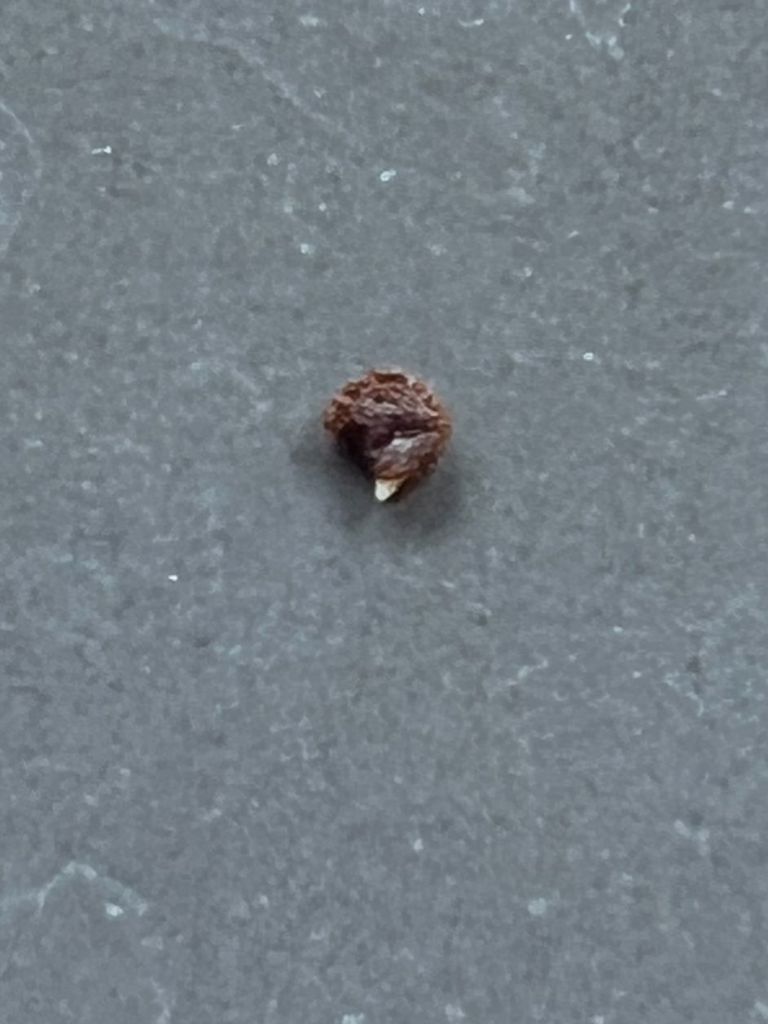
Kanna Seeds

As you can see, the seeds are pretty small. With most small seeds, you can just fling them into a grow bed, water them, and wait for them to sprout. However, I’m guessing that if you purchased some Kanna seeds, you probably only have a few, and you probably paid more than your average typical seed packet costs. You probably want to keep an eye on them and invest your attention in your limited seeds, just like you invested your money into buying them.
Handling Your Kanna Seeds
My first instinct when dealing with Kanna seeds was to pick them up with tweezers. Which was a mistake. After accidentally applying too much pressure and shooting 2 or 3 tiny seeds across my kitchen, I decided to try another method.
Prep Your Area:
I highly recommend you handle your seeds above a white plate or other large flat white surface. My countertops where I do most of my plant prep are a brown, tan, and grey speckled color: perfect for losing a tiny brown seed on. A flat white surface makes it much easier to find any dropped seeds.
Get a glass of water and a toothpick/chopstick out and within reach of your white surface.
Get a sheet of sandpaper (I use 220 grit usually).
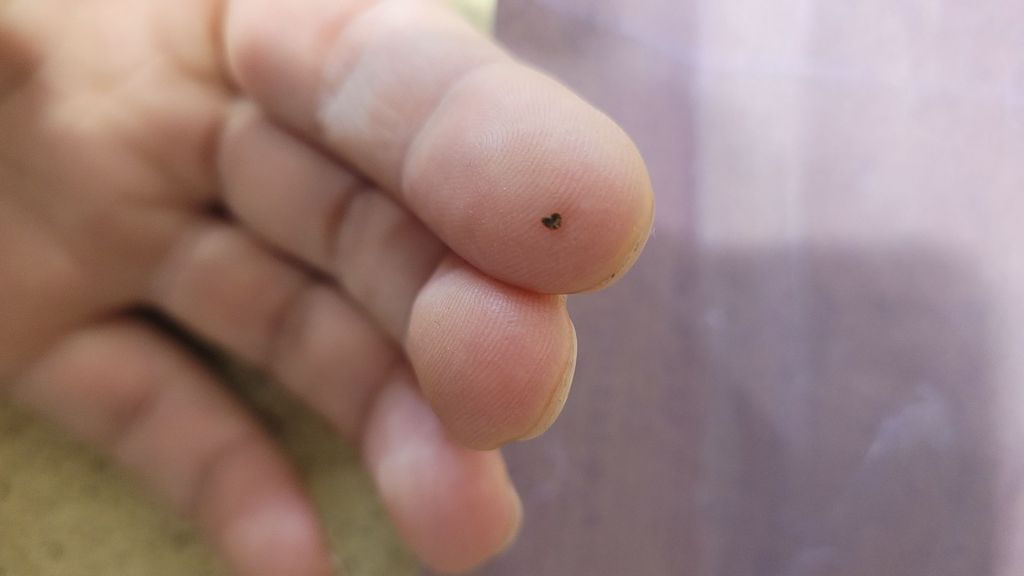
The two ways I pick up my Kanna seeds are with a wet toothpick/chopstick, or by pressing the seed with my finger.
Personally I prefer using my finger because it can be hard to unstick the seed from the wet toothpick/chopstick.
Bypassing the germination inhibitors
The germination inhibitors on your Kanna seeds are present on the seed coat, so all you have to do is allow the outside environment (water specifically) access to the inside of the seed. To do that, we simply rub the seed on some high grit sandpaper to rough up the seed coat.
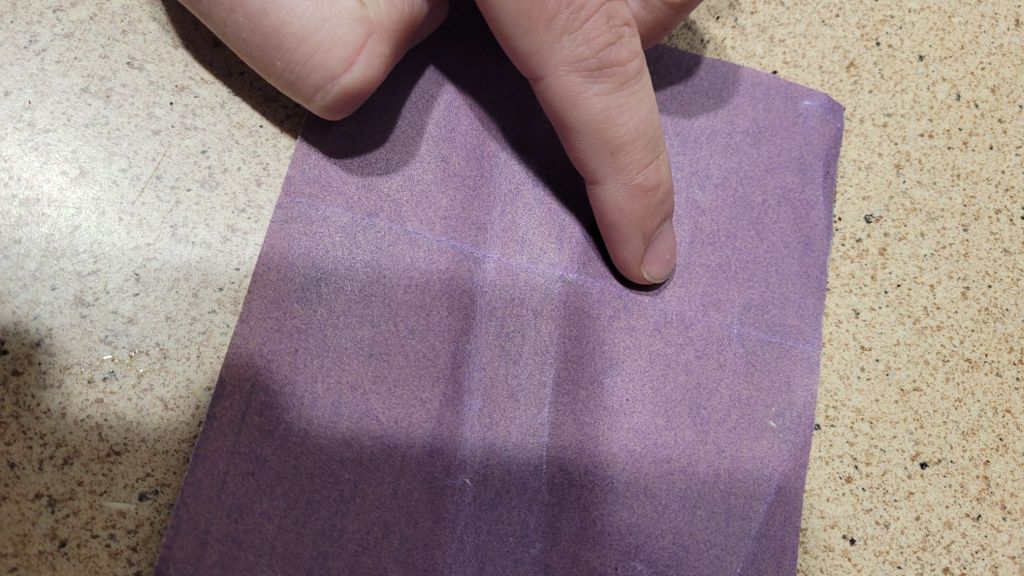
Simply pick up the seed with the pad of your finger and scrape it on your sandpaper. You don’t need to press hard, you’re just trying to make weak spots in the seed coat. If you start to see the white insides of the seed, stop. You have gone too far and may have damaged the seed.
Once you have roughed up the seed, we are going to soak the seeds for a few days. I use a 50ml centrifuge tube, but you can use whatever is convenient for you
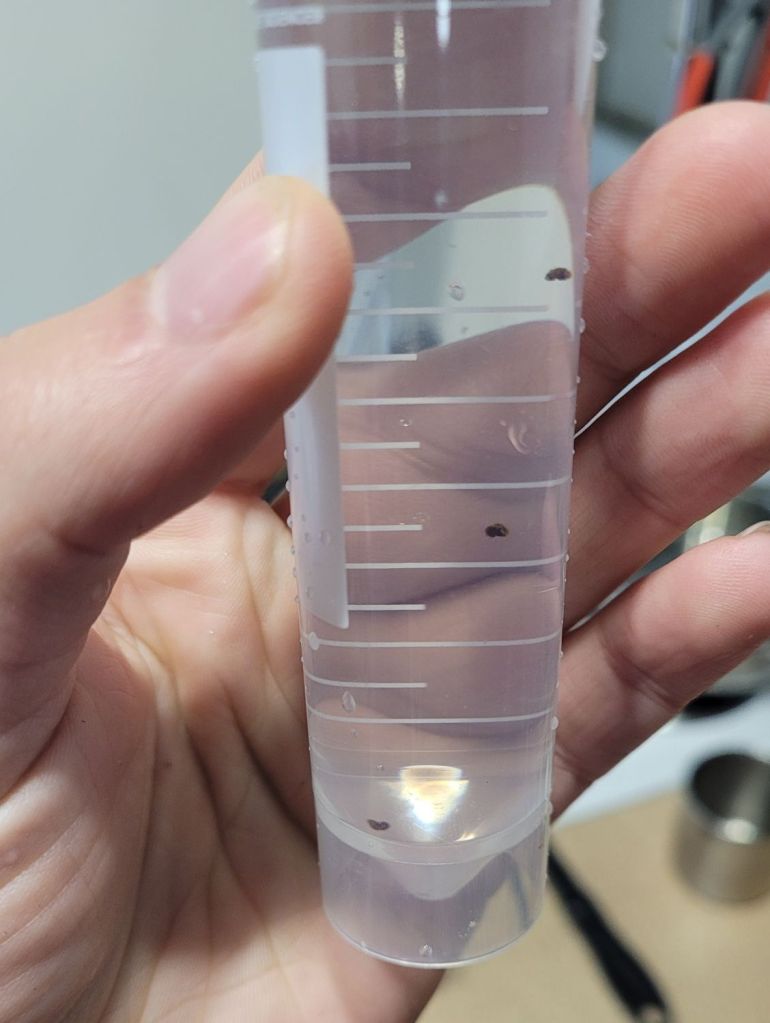
Now, we will soak the seeds for a while. Each day, replace the water your seeds are soaking in. Germination inhibitors are usually water soluble, so this step should both wash away the inhibitors and start the germination process.
After a few days, you should start to see some tendrils appear from the seed. This indicates that you have achieved germination!
This concludes the basics of Kanna germination, we will be posting soon on best ways to plant the seeds and how to get your seedlings to adulthood! Thanks for stopping by!

Leave a comment